A Rainy Afternoon for Mending a Loose Button
A rainy-afternoon button-mending session helps you match buttons, choose suitable thread, and finish the garments that fit your time and supplies.
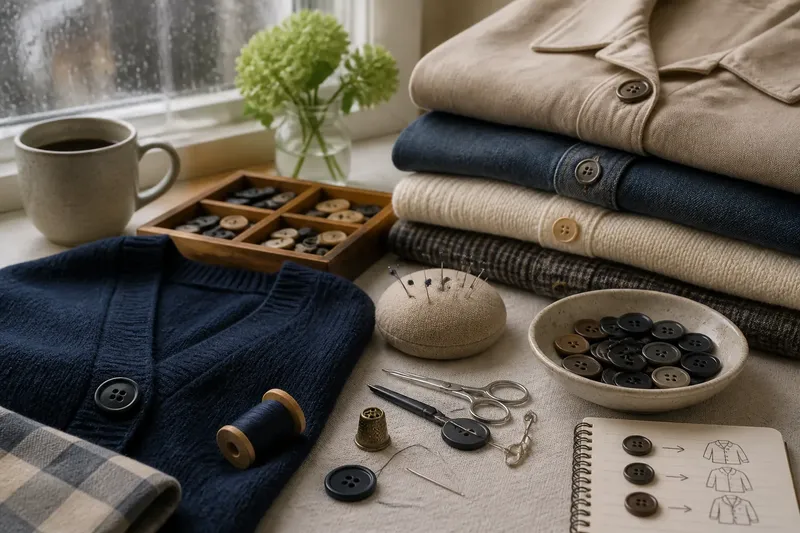
The common mistake with a loose button is sewing it back on before checking whether it belongs there. That can leave you with a mismatched button, the wrong thread, or a second garment waiting for supplies you already had in hand. A rainy-afternoon button-mending session works better as a small sorting job first: gather a few garments, compare their buttons, and decide what can be finished comfortably.
The aim is not to turn a quiet afternoon into a sewing marathon. It is to make a compact work area, group the repairs by what they need, and stop when the light or your patience runs thin. A needle, matching thread, scissors, a pin cushion, and a shallow dish for loose buttons are often enough for ordinary replacements.
Set Up the Afternoon
Choose a table near good daylight. Put down a light-colored cloth if you are working with dark buttons, or a darker cloth if pale buttons are easy to lose against the surface. Keep the garments folded beside you rather than spread across the floor; sleeves and hems can catch on chair legs, and tiny buttons disappear quickly among clutter.
Bring a small sewing kit, but resist the urge to empty every tin or drawer. Include needles in a size that passes through the buttonholes without force, thread in likely colors, sharp scissors, and a few pins. A needle threader can help if threading by hand is awkward. Set a saucer or small tray nearby for buttons removed from garments.
Then collect only a manageable handful of clothes. Look for a loose button, a button that has come off but is still attached to the garment by thread, or an empty button position with a likely spare nearby. Keep garments with missing or uncertain buttons in a separate pile. This first pass is about matching and choosing, not sewing.
Choose by Situation
Different garments call for different decisions. Start with the repair that has the clearest match and the simplest construction. That gives you a useful finish without forcing a guess on a button whose identity or placement is unclear.
If the original button is still attached
Use the hanging button as a reference. Compare its size, color, shape, number of holes, and finish with the spare buttons you have. A button can look similar from above yet sit differently against the fabric; check its thickness and whether it is flat or has a raised shank underneath.
If the thread has only loosened, inspect the button and fabric before deciding to remove it. A button that is intact and sits in the right place may need only a firm reattachment. If the fabric around it is frayed or stretched, set the garment aside rather than pulling hard on the loose threads.
If the button is missing
Search the garment’s pockets, laundry area, and the spot where you usually take it off. A button found with the garment is a stronger match than one chosen from a mixed collection. If no original turns up, check a sewn-on spare—often tucked inside a side seam or label area—before choosing from your button dish.
When a matching spare is not available, consider whether a close substitute will be visible in normal wear. A small difference may be unobtrusive on an inside fastening; on the front of a coat, it may stand out. If the garment uses several identical buttons, replacing just one with a noticeably different version can look more distracting than waiting until you can replace a full set.
If several buttons are loose
Check all the fastenings on that garment before threading the needle. A loose button can be a sign that others are nearing the same state, especially if the garment gets frequent use. Gather the loose ones into one repair group, but do not assume every button needs the same thread or sewing approach.
For a garment with buttons of different sizes or materials, make separate little groups on the table. Keep each group beside the garment it belongs to, and place a note or folded scrap of paper with it if you need to pause. This prevents an attractive spare from being mistaken for the right one later.
If the garment needs a special finish
Some buttons are sewn through a shank, while others have two or four holes. Thick fabric, delicate fabric, decorative buttons, and buttons that fasten under strain may need a different approach from a light shirt button. If the care label, maker’s instructions, or the construction itself calls for special handling, follow that guidance; a tailor or alterations shop can advise when the repair is beyond a simple hand-sewing job.
Match Before Sewing
Place the candidate button beside the one still on the garment, not merely beside another loose button. Compare the color in the same light and look at the button from the side as well as the front. Check that it passes through the buttonhole without catching and that it covers the stitch area without stretching the opening.
Thread color matters, too. For a visible repair, choose a close match to the existing thread or the fabric, depending on which is more apparent. A thread that blends into the button can make stitches less noticeable; one that blends into the garment can suit a button with a contrasting edge. If your spool is an almost-match, lay it across the garment and step back a little. The contrast may be clearer from normal viewing distance.
Say you find a navy cardigan with one loose dark button and a small sewn-on spare inside the hem. You compare the two, confirm that the spare has the same shape and hole arrangement, then choose navy thread that sits quietly against the fabric. The useful result is a repair with a clear match, rather than a hurried substitute from a mixed button tin.
Work in Small Batches
Once the matches are settled, sew one garment at a time. Put its button, thread, and any reference button together before setting the needle. This keeps the work focused and makes it easier to notice when you are about to switch colors or pick up the wrong button.
For an ordinary two- or four-hole button, start by checking where the old stitches entered the fabric. If the button is completely missing, use its original position as a guide: look for the remaining stitch marks or the alignment of neighboring buttons. Keep the button level with the others, and avoid drawing the thread so tight that it puckers the fabric. A button should sit securely while leaving enough room for the buttonhole edge to pass around it.
Do not force a needle through thick layers or a hard button. Choose a suitable needle and work at a pace that keeps your fingers clear of the point. If the fabric shifts, the button sits crooked, or the needle repeatedly meets resistance, pause and reassess rather than tugging harder.
After finishing, fasten the thread on the inside and trim the tail close without nicking the cloth. Gently test the button by moving it with a fingertip, then fasten and unfasten it once. The button should stay in place, the fabric should lie flat, and the closure should move without strain.
Pause Without Losing Parts
A repair session can end before the pile does. If you need to stop, put each unfinished garment in its own small group with its matched button and thread. A shallow bowl, envelope, or labeled scrap of paper can keep the pieces together. Do not leave a threaded needle loose on the table; return it to a pin cushion or another secure holder.
Separate unfinished decisions from unfinished sewing. If you have not found a convincing match, mark that garment as waiting rather than leaving it beside a nearly identical button. If the match is settled but you have not sewn it on, keep the chosen button with the garment so you do not repeat the comparison later.
When you resume, check the garment’s position and the button match before beginning. A brief recheck is less frustrating than completing a repair with the wrong spare. Put finished garments in a separate stack so the remaining work stays visible without making the whole afternoon feel unfinished.
What Fits Your Afternoon?
Should I mend one garment or gather several?
Gather a few garments if they need similar, straightforward repairs and you have suitable buttons and thread. If one garment needs a special match or careful handling, work on it separately so its parts do not get mixed with easier jobs.
What if I cannot find an exact match?
Decide whether the button is visible and whether a close substitute will look intentional beside the others. For a prominent closure or a row of matching buttons, wait for a better match or ask an alterations shop about options instead of sewing on a conspicuous substitute.
Can I use thread that is close but not identical?
Usually, a close color can be appropriate if it blends from ordinary viewing distance and suits the button’s finish. Compare it against both the button and the garment; if the thread becomes the most noticeable part of the repair, choose another spool or leave the job for later.
When should I stop and ask for help?
Stop if the fabric is tearing, the button area is heavily stretched, or the garment’s construction makes the right placement uncertain. A tailor can assess a delicate or structured garment without turning a small repair into a larger one.
Leave a Useful Kit
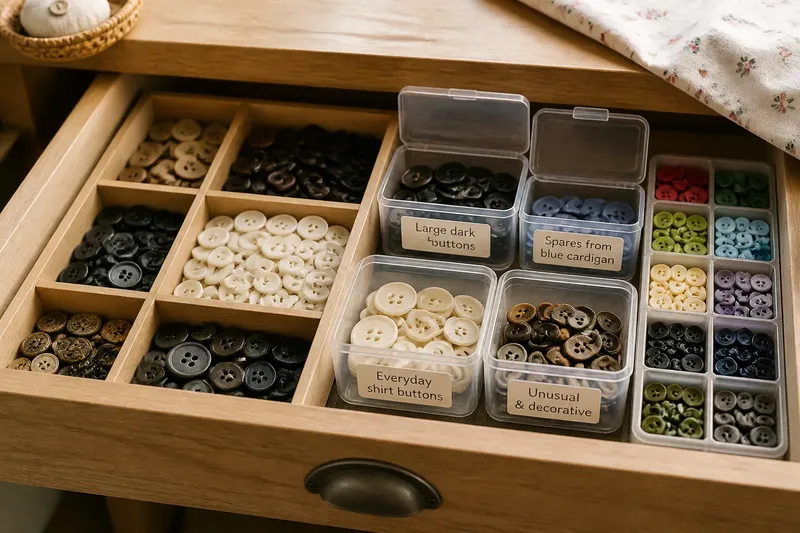
Before putting everything away, return loose buttons to their proper storage and keep any unmatched button with a note about the garment it may fit. Wind thread back onto its spool, return needles to a holder, and put scissors somewhere easy to find. A small kit that stays ready makes the next rainy-afternoon button-mending session simpler to begin.
Most of all, let the final decision be practical: finish the repairs with clear matches, set aside the uncertain ones, and keep the parts together. The value of a calm mending session is not the size of the finished pile; it is knowing which garment is ready to wear and which one needs a better match.